
Explore the delightful world of desserts with this decadent Oreo Balls recipe! Perfect for any occasion, these no-bake treats combine the rich flavors of Oreo cookies and creamy cream cheese, all enveloped in a luscious chocolate coating. Whether you’re hosting a party, celebrating a special event, or simply looking to satisfy your sweet tooth, Oreo Balls are a crowd-pleaser that will have everyone coming back for more. With a simple preparation process and minimal ingredients, this recipe is perfect for bakers of all skill levels. In this article, we’ll delve into the intricacies of making these delightful bites, including the ingredients, step-by-step instructions, and serving suggestions.
Understanding the Ingredients
The Foundation of Oreo Balls
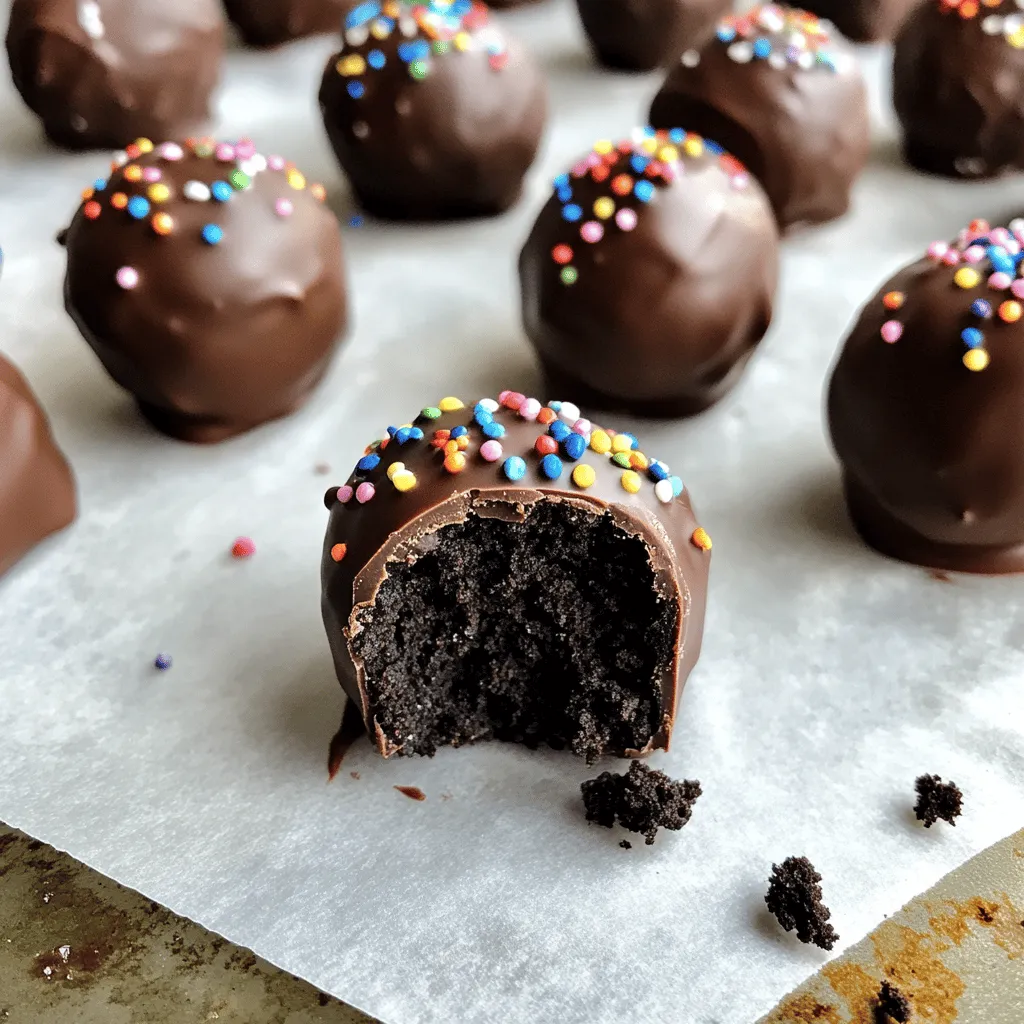
At the heart of this delightful dessert are Oreo cookies, which bring a unique flavor profile that is both chocolatey and creamy. Introduced in 1912, Oreos have become a beloved treat, known for their distinctive dark chocolate wafer cookies and sweet cream filling. The contrast of textures and flavors in Oreos makes them an ideal base for a variety of desserts, including our Oreo Balls.
The next crucial ingredient is cream cheese. This rich, tangy cheese is key to achieving the creamy texture that balances the crunch of the crushed Oreos. When combined, cream cheese and Oreo crumbs create a dough-like consistency that is easy to shape into delightful bite-sized balls. It’s essential to use softened cream cheese to ensure a smooth, even mixture.
When it comes to coating your Oreo Balls, choosing the right type of chocolate is vital. Semi-sweet chocolate chips are a popular choice for their rich flavor and perfect melting properties, but white chocolate can also be used for a sweeter, creamier coating. Each option brings a different taste experience, so feel free to choose according to your preference.
To achieve a smooth and glossy finish on your chocolate coating, you might consider adding a small amount of coconut oil. This ingredient helps the chocolate to melt evenly and can give your Oreo Balls a professional-quality sheen.
Lastly, let’s not forget about optional toppings that can elevate your Oreo Balls both in presentation and flavor. Crushed nuts, sprinkles, or additional crushed Oreos can add a delightful crunch and visual appeal, making your treats even more enticing.
Step-by-Step Guide to Making Oreo Balls
Crushing the Cookies
The first step in creating these mouthwatering Oreo Balls is to crush the cookies. Achieving the perfect crumb texture is essential for the overall consistency of the dessert. Ideally, you want fine crumbs that will easily combine with the cream cheese.
If you have a food processor, this task becomes a breeze. Simply add the whole Oreo cookies (no need to separate the cream filling) into the processor and pulse until you reach a fine crumb texture. This method is quick and efficient, ensuring a uniform crumb that will blend seamlessly with the cream cheese.
For those without a food processor, don’t worry! There are alternative methods to crush Oreos effectively. One of the simplest techniques involves placing the cookies in a resealable plastic bag, sealing it tightly, and using a rolling pin to crush them. This method allows you to control the size of the crumbs, so you can achieve a texture that suits your preference. Just be sure to be gentle at first to avoid tearing the bag.
Combining Ingredients
Once your Oreo cookies are crushed, the next step is to combine them with the cream cheese. In a large mixing bowl, add the crushed Oreos and softened cream cheese. Using a spatula or your hands, mix the two ingredients until they form a smooth, cohesive dough.
It’s important to ensure that the cream cheese is adequately softened to room temperature; this will make it easier to blend with the crumbs, resulting in a smooth and pliable mixture. If the dough feels too crumbly, you can add a little more cream cheese until you reach the desired consistency. Conversely, if it seems too sticky, a few more crushed Oreos can help balance it out.
You want the final mixture to be thick enough to hold its shape when rolled into balls but soft enough to easily form into smooth spheres.
Shaping the Oreo Balls
Once your mixture is well combined, it’s time to shape the Oreo Balls. Using a small cookie scoop or your hands, portion out the mixture. Aim for uniform sizes, about 1 inch in diameter, to ensure even coating and presentation.
Roll the mixture between your palms to form smooth balls. This step is crucial, as rough edges or uneven shapes can affect the final look of your treats. If you find the mixture is sticking to your hands, consider lightly greasing your palms with a bit of butter or cooking spray.
After rolling, place the shaped Oreo Balls on a baking sheet lined with parchment paper. This will prevent them from sticking and make cleanup easier.
Chilling for Firmness
Before coating your Oreo Balls in chocolate, it’s essential to chill them. This step helps the balls firm up, making them easier to coat without losing their shape. Place the baking sheet with the Oreo Balls in the refrigerator for at least 30 minutes, or until they are firm to the touch.
Chilling the mixture not only helps in shaping but also enhances the flavors, allowing the cream cheese and Oreos to meld together beautifully. If you’re in a hurry, you can also place them in the freezer for about 15-20 minutes.
Melting the Chocolate
While your Oreo Balls are chilling, it’s the perfect time to prepare the chocolate coating. To melt your chosen chocolate chips (semi-sweet or white chocolate), you can use a microwave or a double boiler method.
For the microwave method, place the chocolate chips in a microwave-safe bowl. Heat in 30-second increments, stirring between each interval, until the chocolate is completely melted and smooth. Be careful not to overheat, as chocolate can burn easily.
If you prefer the double boiler method, fill a saucepan with a couple of inches of water and bring it to a simmer. Place a heatproof bowl over the saucepan, ensuring it doesn’t touch the water, and add the chocolate chips to the bowl. Stir occasionally until melted and smooth.
Once your chocolate is ready, you can add the optional coconut oil if you wish, stirring it in until well combined. This will help create a smoother coating and improve the overall texture of your chocolate.
Now that you have a detailed understanding of the ingredients and initial steps for making Oreo Balls, you are well on your way to crafting these delightful treats. In the next part of this article, we will explore the process of coating your Oreo Balls in chocolate and adding those finishing touches that will make them irresistible. Stay tuned for the continuation of this sweet journey!

Techniques for Safely Melting Chocolate
Melting chocolate can seem daunting, but with the right techniques, it can be a simple and enjoyable process. Here are a few methods to melt chocolate safely, ensuring a smooth and creamy consistency:
1. Double Boiler Method: This is one of the safest ways to melt chocolate. Fill a pot with a few inches of water, then place a heatproof bowl on top, ensuring it doesn’t touch the water. Heat the water gently, allowing the steam to melt the chocolate in the bowl. Stir occasionally until fully melted.
2. Microwave Method: If you prefer a quicker method, melting chocolate in the microwave can be effective. Place chopped chocolate or chocolate chips in a microwave-safe bowl. Heat in 20-30 second intervals, stirring between each interval. This will help prevent overheating, which can cause the chocolate to seize.
3. Avoid Direct Heat: When melting chocolate, avoid direct heat sources. High temperatures can cause chocolate to scorch, resulting in a grainy texture. Always opt for gentle heat to maintain the integrity of the chocolate.
The Benefits of Adding Coconut Oil
Incorporating coconut oil into your melted chocolate can enhance both the flavor and texture of your Oreo Balls. Here’s why you should consider adding it:
– Smooth Texture: Coconut oil helps create a smoother chocolate coating, making it easier to dip your Oreo balls. It also helps the chocolate adhere better to the balls, reducing the risk of cracking or separating.
– Flavor Enhancement: The subtle sweetness and tropical flavor of coconut oil complement the rich taste of chocolate and Oreos, adding an extra layer of deliciousness to your dessert.
– Improved Coating: When chocolate is mixed with coconut oil, it sets with a glossy finish, giving your Oreo Balls a professional look. The added oil helps the chocolate harden uniformly, making for an aesthetically pleasing treat.
Dipping and Coating
Now that you have your chocolate melted and ready, it’s time to dip your Oreo balls. Follow these step-by-step instructions for a perfect coating:
1. Prepare Your Workspace: Line a baking sheet with parchment paper to place the dipped Oreo balls. This will prevent them from sticking and make cleanup easier.
2. Scoop and Dip: Using a fork or a toothpick, take one Oreo ball and dip it into the melted chocolate. Ensure it’s fully submerged, allowing the chocolate to coat it completely.
3. Remove Excess Chocolate: Lift the ball out of the chocolate and gently tap the fork against the edge of the bowl. This will help shake off any excess chocolate, ensuring an even coating without globs.
4. Place on Parchment: Carefully transfer the coated ball to the prepared parchment paper. Repeat the process for the remaining Oreo balls.
Tips for Achieving an Even Coating and Removing Excess Chocolate
– Work in Batches: If you’re making a large quantity, work in small batches to prevent the chocolate from cooling and thickening too quickly.
– Maintain Chocolate Temperature: Keep the melted chocolate warm during dipping by placing it over a low heat or using a heating pad underneath the bowl.
– Use a Toothpick for Precision: For a more precise dip, consider using a toothpick to secure the Oreo ball. This allows you to dip it without getting your fingers messy and makes it easier to maneuver.
Decorating for a Personal Touch
Adding decorations to your Oreo Balls not only enhances their presentation but also allows for creativity. Here are some fun ideas for toppings and decorations:
– Crushed Oreos: Sprinkle crushed Oreo crumbs on top of your dipped balls before the chocolate sets. This adds texture and reinforces the Oreo flavor.
– Colored Drizzles: Use melted colored chocolate (or candy melts) to drizzle over the top of the coated balls for a fun and vibrant look. This is especially great for themed parties.
– Sprinkles and Nuts: Consider using colorful sprinkles, chopped nuts, or toasted coconut for added crunch and visual appeal.
How to Use Toppings to Enhance Aesthetics
– Contrast in Colors: Use contrasting colors for drizzles and toppings to create an eye-catching effect. For example, white chocolate drizzled over dark chocolate balls can look stunning.
– Seasonal Themes: Tailor your decorations to match the season or occasion—red and green sprinkles for Christmas, pastel colors for Easter, or bright colors for a summer gathering.
Setting the Coating
To ensure your chocolate coating sets properly, follow these best practices:
1. Cool at Room Temperature: Allow the dipped Oreo balls to cool at room temperature for about 30 minutes. This helps the chocolate harden without becoming too brittle.
2. Refrigeration: For faster setting, place the baking sheet in the refrigerator for about 15-20 minutes. This will quickly firm up the chocolate coating.
3. Avoid Overcrowding: If you are placing the chocolate-coated Oreo balls in the refrigerator, make sure they have space between them to avoid sticking.
Time-Saving Methods to Speed Up the Setting Process
– Chill Your Ingredients: Starting with chilled Oreo balls can help speed up the cooling process of the chocolate coating.
– Use a Fan: If you have a fan, place it near the cooling area to circulate air, which can help the chocolate set faster.
Serving Suggestions and Storage Options
Presenting Your Oreo Balls
Creating a beautiful presentation for your Oreo Balls can elevate any gathering. Here are some creative serving ideas:
– Dessert Platter: Arrange your Oreo Balls on a decorative platter, alternating between different types of toppings for visual interest.
– Individual Treat Bags: Place Oreo Balls in small treat bags tied with ribbon for a party favor that guests can take home.
– Gourmet Dessert Table: Include the Oreo Balls as part of a larger dessert table, paired with other sweet treats like cupcakes or brownies for variety.
Recommendations for Pairing with Beverages or Other Desserts
– Coffee or Tea: The rich flavors of Oreo Balls pair perfectly with a cup of coffee or tea. Consider serving them alongside a dark roast or a flavored tea.
– Milk: For a classic pairing, serve Oreo Balls with a glass of cold milk. This nostalgic combination will delight both kids and adults alike.
– Ice Cream: Create an indulgent dessert by serving Oreo Balls alongside a scoop of vanilla or chocolate ice cream.
Storage Guidelines
To maintain the freshness of your Oreo Balls, follow these storage guidelines:
– Room Temperature: If you plan to consume your Oreo Balls within a week, they can be stored in an airtight container at room temperature.
– Refrigeration: For longer storage, keep them in the refrigerator. Ensure they are in an airtight container to prevent them from absorbing moisture or odors.
– Freezing: Oreo Balls can also be frozen for up to three months. Place them in a single layer on a baking sheet until frozen, then transfer them to an airtight container, separating layers with parchment paper.
Shelf Life and Tips for Keeping Them Delicious
– Consume within 1-2 weeks: For the best taste and texture, enjoy your Oreo Balls within 1-2 weeks of making them.
– Thawing: If frozen, allow them to thaw in the refrigerator for a few hours before serving. This will help maintain their texture and flavor.
Nutritional Information
Nutritional Breakdown
While Oreo Balls are undeniably a treat, it’s essential to be aware of their nutritional content. Here’s a general overview per serving (approximately 1 ball):
– Calories: 120-150
– Fat: 8-10g
– Carbohydrates: 15-20g
– Sugar: 10-12g
– Protein: 1-2g
Health Considerations for Indulgent Treats Like Oreo Balls
While these treats are delicious, they should be enjoyed in moderation, especially if you’re watching your caloric intake. Oreo Balls are high in sugar and fat, making them a rich dessert option. Consider balancing them with healthier snacks or desserts when serving at gatherings.
Conclusion
In conclusion, Oreo Balls are a simple yet decadent dessert that promises to delight anyone with a sweet tooth. With minimal ingredients and a straightforward preparation process, they are perfect for gatherings, celebrations, or just a satisfying treat at home. By following this detailed guide, you can confidently create these delicious bites and share them with friends and family. Whether enjoyed as a special occasion treat or a quick snack, these Oreo Balls are sure to become a favorite in your dessert repertoire. Their customizable nature and delightful flavors make them an ideal choice for any event, ensuring that they will impress and satisfy everyone who tries them.